 Woodworking Ideas Latest Woodworking Design Ideas
Today’s topic is all about DIY Wood Pantry Shelving. We will be discussing the different types of pantry shelving, the benefits of opting for DIY pantry shelving, the advantages of using wood as your primary building material, how to make DIY Pantry Shelves, and some tips to make your DIY project a success.
Table of Contents
DIY Wood Pantry Shelving Ideas
There are numerous DIY pantry shelving ideas to choose from, ranging from simple to intricate designs. Your budget, space, and personal preferences will play a significant role in determining the type of pantry shelving that will work for you. Here are some popular ideas to explore:
Floating Wood Shelves

Floating wood shelves are a great idea for those who want an open and airy feel in their pantry. They are easy to install and can be designed to fit your needs perfectly. You can customize your floating shelves by adding pegs or hooks to hang pots, pans, or utensils. They are also versatile and can be used in any room of your home.
Custom Wood Cabinets
Custom wood cabinets are perfect for those who want a bespoke look and feel in their pantry. They can be designed to match your kitchen cabinetry or be completely unique. Custom cabinets are a great way to maximize your storage space and keep everything organized.
Wooden Crates
Wooden crates are an excellent option for those who want a rustic and vintage look in their pantry. You can stack them to create a shelving unit or use them as individual units for easy organization. Wooden crates are also affordable and can be easily found at your local thrift store or online marketplace.
Why Opt for DIY Pantry Shelving?
Opting for DIY pantry shelving comes with many benefits. Here are some reasons why you might want to consider doing it yourself:
Cost-Effective
DIY pantry shelving is an affordable option compared to purchasing pre-made shelving units. You can create custom shelving according to your needs, which can reduce the overall cost of your pantry renovation.
Personalized Design
If you’re looking for a unique and personalized pantry design, DIY shelving is your best bet. You can choose materials, design, and color to best fit your unique style and decor.
Easy to Maintain
DIY pantry shelving is easy to maintain and clean. You can wipe down wooden shelving with a damp cloth, and metal or plastic shelving can be washed with soap and water.
Different Types of Wood for Pantry Shelving
Choosing the right type of wood for your pantry shelving is essential. Here are some different types of wood you can use for your project:
Pine
Pine is an affordable choice for pantry shelving. It has a light color, and its softwood makes it easy to work with. However, it is more prone to dents and scratches than other hardwoods, so it might not be the best choice for high-traffic pantries.
Maple
Maple is a popular choice for pantry shelving. It has a subtle grain pattern and a light-colored wood that complements most pantry designs. Maple is hard and durable, making it a great choice for high-traffic areas.
Cherry
Cherry is a high-end choice for pantry shelving. It has a beautiful reddish-brown color that darkens over time. It’s also hard and durable, making it a great choice for high-traffic areas, but it’s expensive compared to other types of wood.
The Benefits of Using Wood for Pantry Shelving
Wood is a popular choice for pantry shelving for many reasons. Here are some benefits of using wood for your DIY pantry shelving project:
Sturdy and Durable
Wood is hard and sturdy, making it a great choice for high-traffic areas like your pantry. It can hold heavy items without bending or breaking, making it an excellent choice for storing bulky items like cans, bottles, or appliances.
Natural and Appealing
Wood is a natural material that gives your pantry an earthy and natural feel. It’s visually appealing and can complement any pantry design or decor.
Easy to Work With
Wood is an easy material to work with, making it perfect for DIY projects. It can be easily cut, drilled, or sanded to your desired shape or size.
Advantages of DIY Pantry Shelving
DIY pantry shelving has many advantages over pre-made shelving units. Here are some reasons why you might want to consider DIY Pantry Shelving:
Customization
DIY pantry shelving allows you to customize your shelving units to fit your unique requirements. You can choose to add shelves, hooks or even lighting to your design.
Cost-Effective
DIY pantry shelving is an affordable option compared to purchasing pre-made shelving units. You can create custom shelving according to your needs, which can reduce the overall cost of your pantry renovation.
Creative and Fun
DIY pantry shelving can be a fun and creative project to do by yourself or with family and friends. You can explore different designs and materials, giving your pantry a unique and personalized look.
How to Make DIY Pantry Shelves
Making DIY pantry shelves is a simple and easy process. Here’s our step-by-step guide to get you started:
Step 1: Measure the Space
The first step is to measure your pantry’s width, length and height. This will help you determine the size of your shelving unit and the number of shelves you’ll be able to fit in your pantry space.
Step 2: Choose the Wood
Choose the type of wood you want to use for your pantry shelves. We recommended using hardwoods like oak, maple or cherry to ensure durability and sturdiness.
Step 3: Gather the Tools
You’ll need a few essential tools to complete your DIY pantry shelf project. Here is a list of the basic tools you’ll need:
- Saw
- Miter saw or circular saw
- Jigsaw or scroll saw
- Sander or sandpaper (grit: 80-120)
- Drill
- Wood screws and nails
Step 4: Cut the Wood
Measure the wood according to your pantry’s dimensions and then cut the board to size using a saw. Use a miter saw or a circular saw to cut your wood into appropriate sizes.
Step 5: Sand the Wood
Once you have cut the wood to size, sand it down using sandpaper or a sander. Make sure you sand the wood until it’s smooth and free of rough edges.
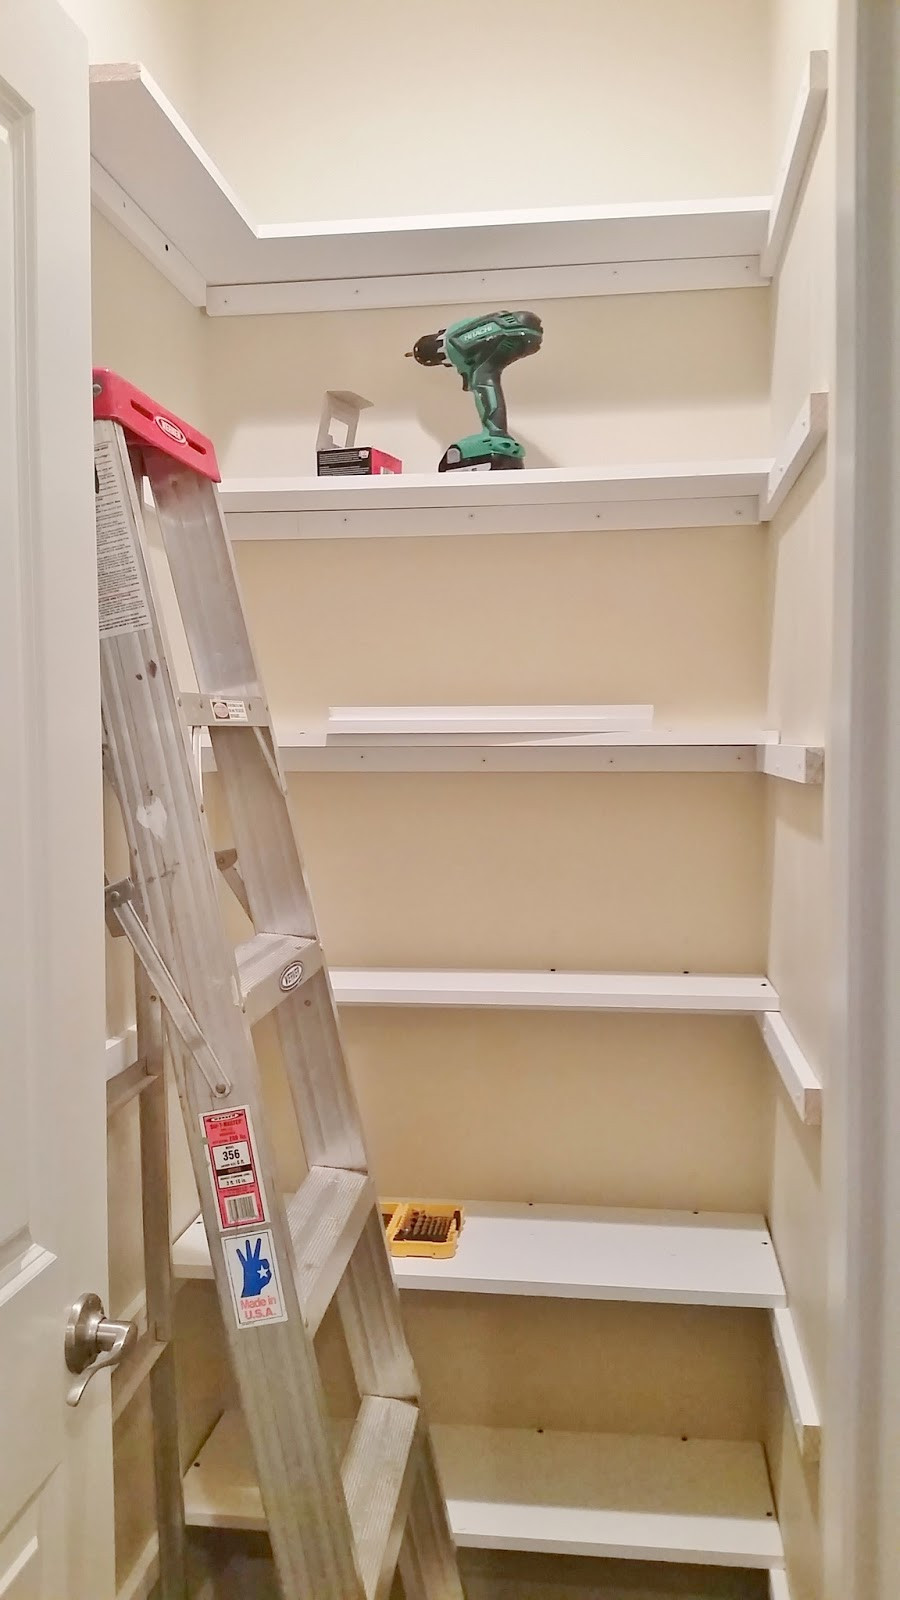
Step 6: Assemble the Shelves
Begin assembling the shelves, attach the bottom shelf first, then overlap with the next piece of wood above it, and attach it as well, continue with all of your shelves. Finally, add the vertical supports to stabilize your new DIY pantry shelving.
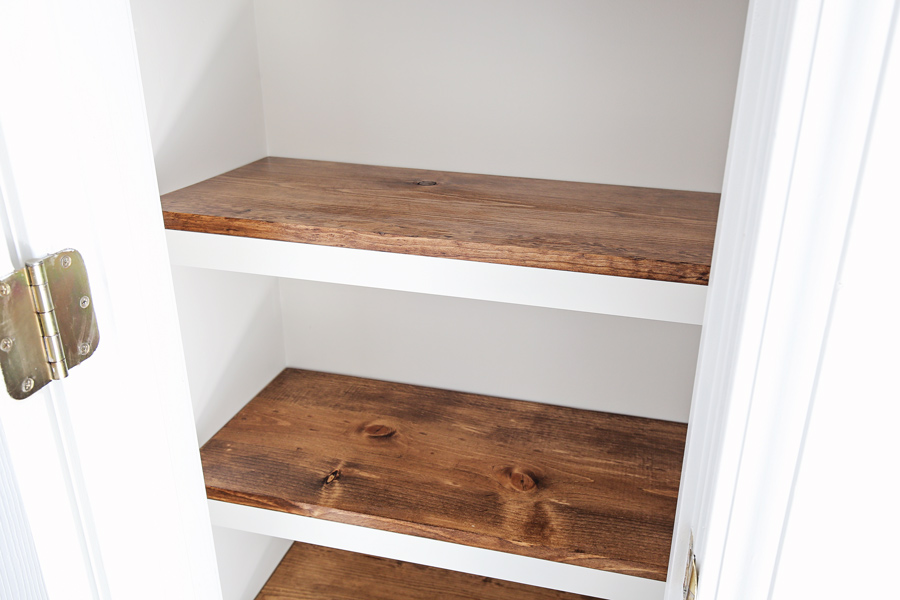
Step 7: Finish the Wood
Once you have assembled the shelves, you can stain or paint the wood to match your pantry’s decor or leave it natural for a rustic look.
Tips for Successful DIY Pantry Shelving Project
Making DIY Pantry Shelving requires some skill and patience, here are some tips to ensure your project runs smoothly:
Choose the Right Tools
Choosing the right tools will make your DIY project much easier. Make sure you have everything you’ll need before starting your project.
Measure Accurately
Make sure you measure your pantry space accurately to avoid having to redo parts of your project. Measure twice, Cut once!.
Use High-Quality Materials
Using high-quality wood and materials will ensure your pantry shelving is sturdy and durable. It’s worth splurging on good wood to get longevity and strength.
Clean Up as You Go
Clean up as you work and keep your tools organized, making it much easier to keep track of everything and avoid accidents midway through the project.
Be Patient
DIY projects require patience and attention to detail. Don’t rush, take your time, and enjoy the process.
In conclusion, DIY Wood Pantry Shelving is a great idea for those who want a customized pantry design, save on costs, and enjoy a fun and creative project. Choose the right wood, tools, and follow our tips to ensure your DIY project is a success.


