 Woodworking Ideas Latest Woodworking Design Ideas
Have you ever looked at your bare walls and thought, “something is missing”? Well, you’re not alone! Lucky for you, we’ve found some awesome DIY wood wall shelves that will give your walls the oomph they need.
Table of Contents
DIY Solid Wood Wall-to-Wall Shelves
If you want to go big, go with these beautiful solid wood wall-to-wall shelves. These shelves are perfect for displaying your favorite decor items, books, and photos. Plus, it’s a great conversation starter! Everyone will want to know how you managed to build such a stunning piece.

What are they?
These shelves are an impressive DIY project that involve building shelves that span the entire length of your wall.
Why try them?
If you’re looking for a way to add both beauty and functionality to your home, these wall-to-wall shelves are a great option. Not only do they look great, but they’ll also give you plenty of space to display your favorite things.
Some different types of DIY Wood Wall Shelves
If you’re not quite ready to tackle the wall-to-wall shelves, here are some other DIY wood wall shelves worth considering:
- Floating shelves
- Crate shelves
- Pegboard shelves
- Pallet shelves
The benefits and advantages of DIY Wood Wall Shelves
There are many reasons why you should consider adding DIY wood wall shelves to your home, including:
- They provide extra storage space.
- They can be customized to fit your style and decor.
- They’re a great way to display your favorite things.
- They’re relatively easy to make.
- They’re a budget-friendly alternative to store-bought shelves.
How to make them?
The process of making DIY wood wall shelves will vary depending on the type of shelf you choose to make. However, here are some general tips to keep in mind:
- Measure your wall to determine the length of your shelves.
- Choose your wood and cut it to the desired length.
- Sand your wood to smooth out any rough spots.
- Stain or paint your wood to match your decor.
- Install any necessary hardware (such as brackets or hangers).
- Hang your shelves on the wall.
- Arrange your favorite items on the shelf and enjoy!
Tips for making DIY Wood Wall Shelves
Here are some tips to help you make the most of your DIY wood wall shelves:
- Choose a wood that’s sturdy enough to hold your items.
- Consider the weight of the items you want to display when choosing hardware.
- Use a level to ensure your shelves are straight.
- Choose a stain or paint color that complements your decor.
- Consider adding lighting to your shelves to make your items stand out.
16 Easy and Stylish DIY Floating Shelves & Wall Shelves
If you’re looking for more inspiration, check out these 16 easy and stylish DIY floating shelves & wall shelves. These projects range from simple to more complex, so there’s something for everyone!
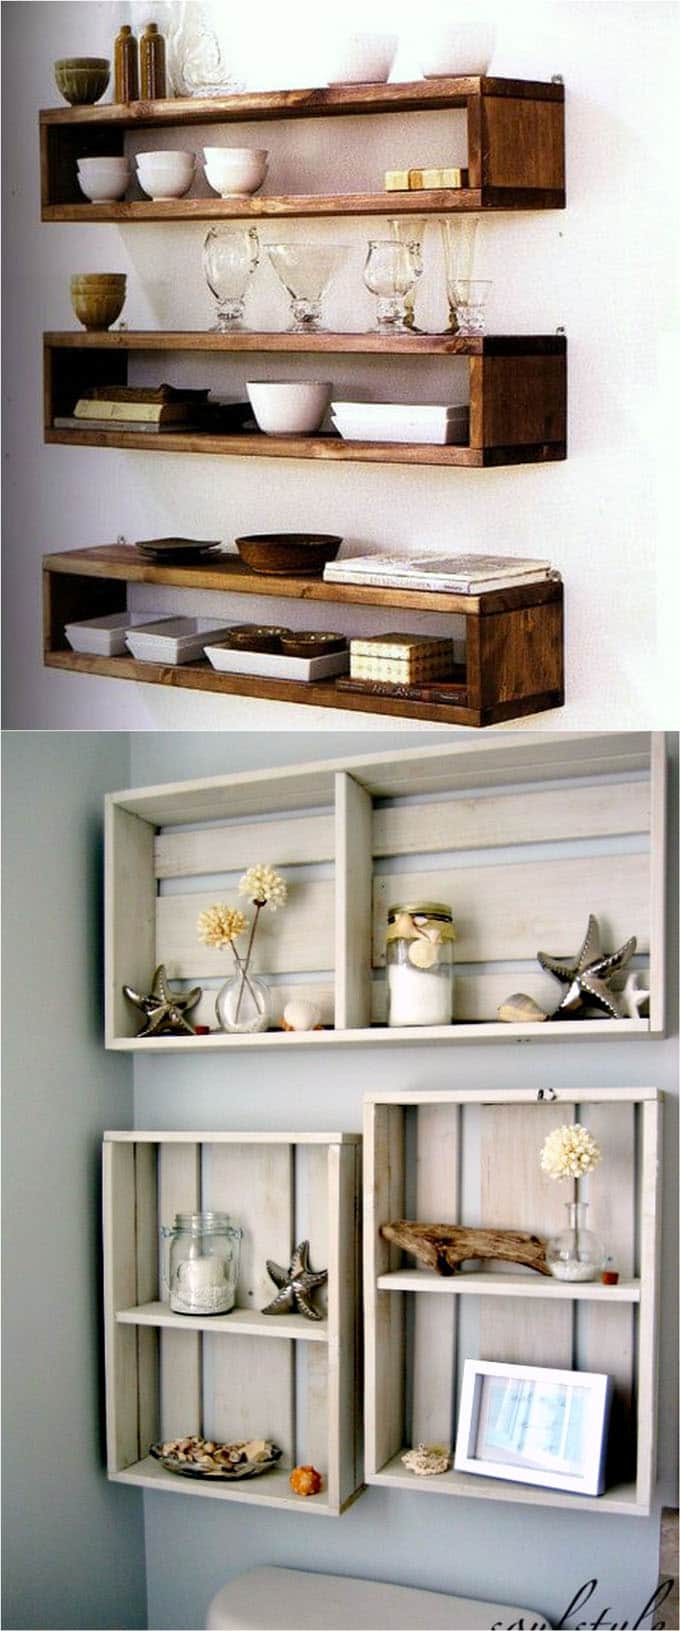
What are they?
These shelves are all DIY projects that involve creating floating or wall-mounted shelves out of wood.
Why try them?
There are many reasons to try making these DIY floating shelves and wall shelves, including:
- They’re a budget-friendly alternative to store-bought shelves.
- They can be customized to fit your style and decor.
- They’re a great way to display your favorite things.
- They can be used in any room of the house.
Some different types of DIY Wood Wall Shelves
Here are some of the different types of DIY wood wall shelves you’ll find in this collection:
- Floating corner shelves
- Pocket hole wall shelves
- Industrial pipe shelves
- Scandinavian-inspired floating shelves
- Chunky wooden wall shelves
The benefits and advantages of DIY Wood Wall Shelves
Here are some of the benefits and advantages of these DIY wood wall shelves:
- They’re a budget-friendly way to add storage and style to your home.
- They can be customized to fit your unique decor.
- They can be used in any room of the house.
- Making your own shelves is a great way to learn new DIY skills.
How to make them?
The process of making these DIY wood wall shelves will vary depending on the project you choose to make. However, many of the projects in this collection involve the same basic steps:
- Cut your wood to the desired length.
- Sand your wood to smooth out any rough spots.
- Stain or paint your wood to match your decor.
- Install any necessary hardware (such as brackets or hangers).
- Hang your shelves on the wall.
- Arrange your favorite items on the shelf and enjoy!
Tips for making DIY Wood Wall Shelves
Here are some tips to help you make the most of your DIY wood wall shelves:
- Choose a wood that’s sturdy enough to hold your items.
- Consider the weight of the items you want to display when choosing hardware.
- Use a level to ensure your shelves are straight.
- Choose a stain or paint color that complements your decor.
- Consider adding lighting to your shelves to make your items stand out.
DIY Crate Shelf Statement Wall
If you’re looking for a unique way to add both storage and style to your home, this DIY crate shelf statement wall is worth considering. These shelves are created by stacking wooden crates on top of each other to create a statement wall.
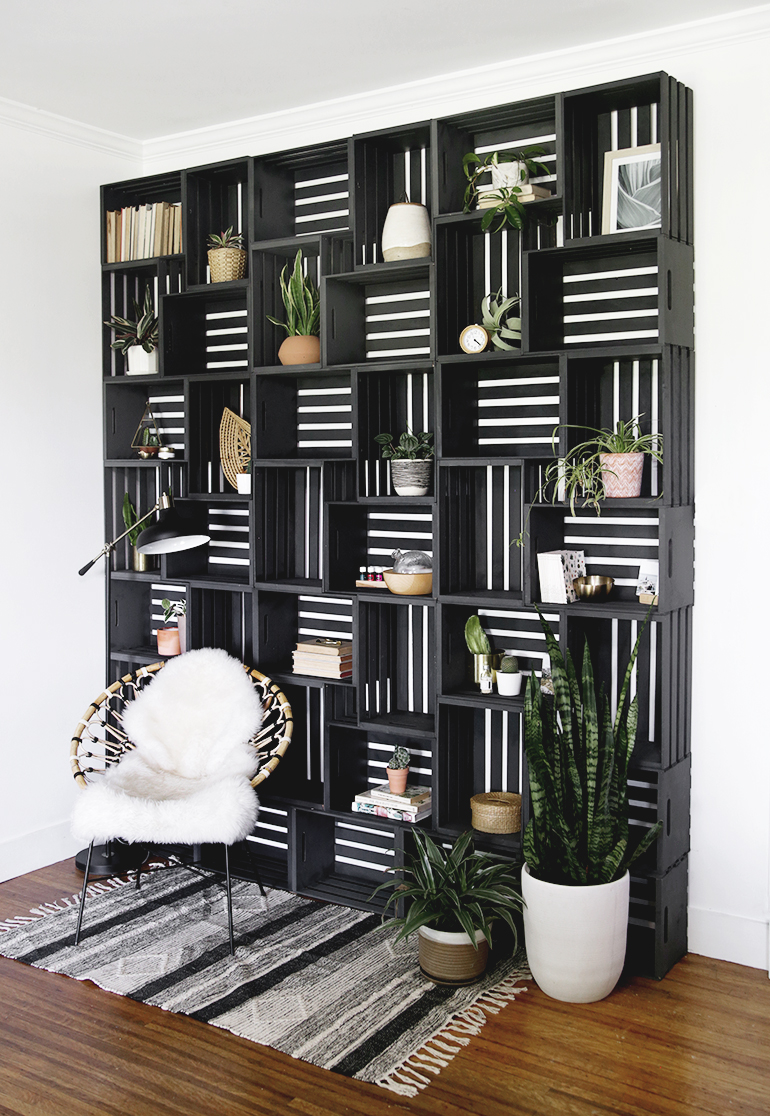
What are they?
These shelves are created by stacking wooden crates on top of each other to create a statement wall.
Why try them?
There are many reasons to try making this DIY crate shelf statement wall, including:
- It’s a unique and eye-catching way to add storage to your home.
- It’s a budget-friendly alternative to store-bought shelves.
- You can customize the look and style of your crates to fit your decor.
- It’s a fun DIY project.
The benefits and advantages of DIY Wood Wall Shelves
Here are some of the benefits and advantages of this DIY crate shelf statement wall:
- It’s a budget-friendly way to add storage and style to your home.
- You can customize the look and style of your crates to fit your unique decor.
- It’s a unique and eye-catching way to display your favorite items.
- Making your own shelves is a great way to learn new DIY skills.
How to make them?
Here’s how to make your own DIY crate shelf statement wall:
- Collect or purchase wooden crates that are the same size.
- Sand your crates to smooth out any rough spots.
- Stain or paint your crates to match your decor.
- Install any necessary hardware (such as wall anchors).
- Stack your crates on top of each other to create a statement wall.
- Arrange your favorite items on the shelf and enjoy!
Tips for making DIY Wood Wall Shelves
Here are some tips to help you make the most of your DIY crate shelf statement wall:
- Choose crates that are the same size for a uniform look.
- Consider using different colors or stains to create a unique look.
- Use wall anchors to ensure your crates are secure.
- Consider adding lighting to your shelves to make your items stand out.
Final Thoughts
There are many ways to add both beauty and functionality to your home with DIY wood wall shelves. Whether you’re looking for a minimalist floating shelf or a statement wall made from wooden crates, there’s a DIY project out there that’s perfect for you. So grab your tools and get started!


