 Woodworking Ideas Latest Woodworking Design Ideas
Have you been looking for ways to maximize the organization of your living space without sacrificing style? Look no further than these creative DIY floating wall corner shelves ideas! Whether you’re looking for a practical addition to your bathroom, kitchen or bedroom, there’s a corner shelf design that will elevate your décor while providing much-needed storage space. Check out some of our favorites below:
Table of Contents
1. Rustic Wooden Spiral Shelves

What: A series of rustic wooden shelves, spiraling up the corner of your living space.
Why: These shelves add a charming, old-world feel to any room. Plus, their unique spiral design makes them stand out from traditional rectangular shelves.
Types of: You can create spiral shelves using reclaimed wood, or purchase a pre-manufactured unit from retailers like Etsy.
Benefits: These shelves add a rustic element to living spaces, while providing a practical storage solution for books, vases and other décor items.
Advantages: The timeless style of these shelves means they can be used in any room of the home, from the bedroom to the living room.
How to: To DIY this rustic wooden spiral, follow this step-by-step guide:
- Gather reclaimed wood and any necessary tools, such as a power saw and drill.
- Cut the wood into various lengths, ranging from 6 inches to 12 inches.
- Use a drill to create holes in the center of each wooden piece.
- Starting from the floor, use screws to attach the wooden pieces to the wall in a spiral pattern.
- Once you’ve attached all the pieces, sand the edges and surfaces smooth.
- Stain or paint the shelves to match your décor.
- Add small brackets to secure the bottom and top shelves in place, if desired.
Tips: To achieve a true rustic look, choose a light-colored stain for the wood and sand the edges to achieve a worn effect.
2. Bathroom Glass Triangular Rack
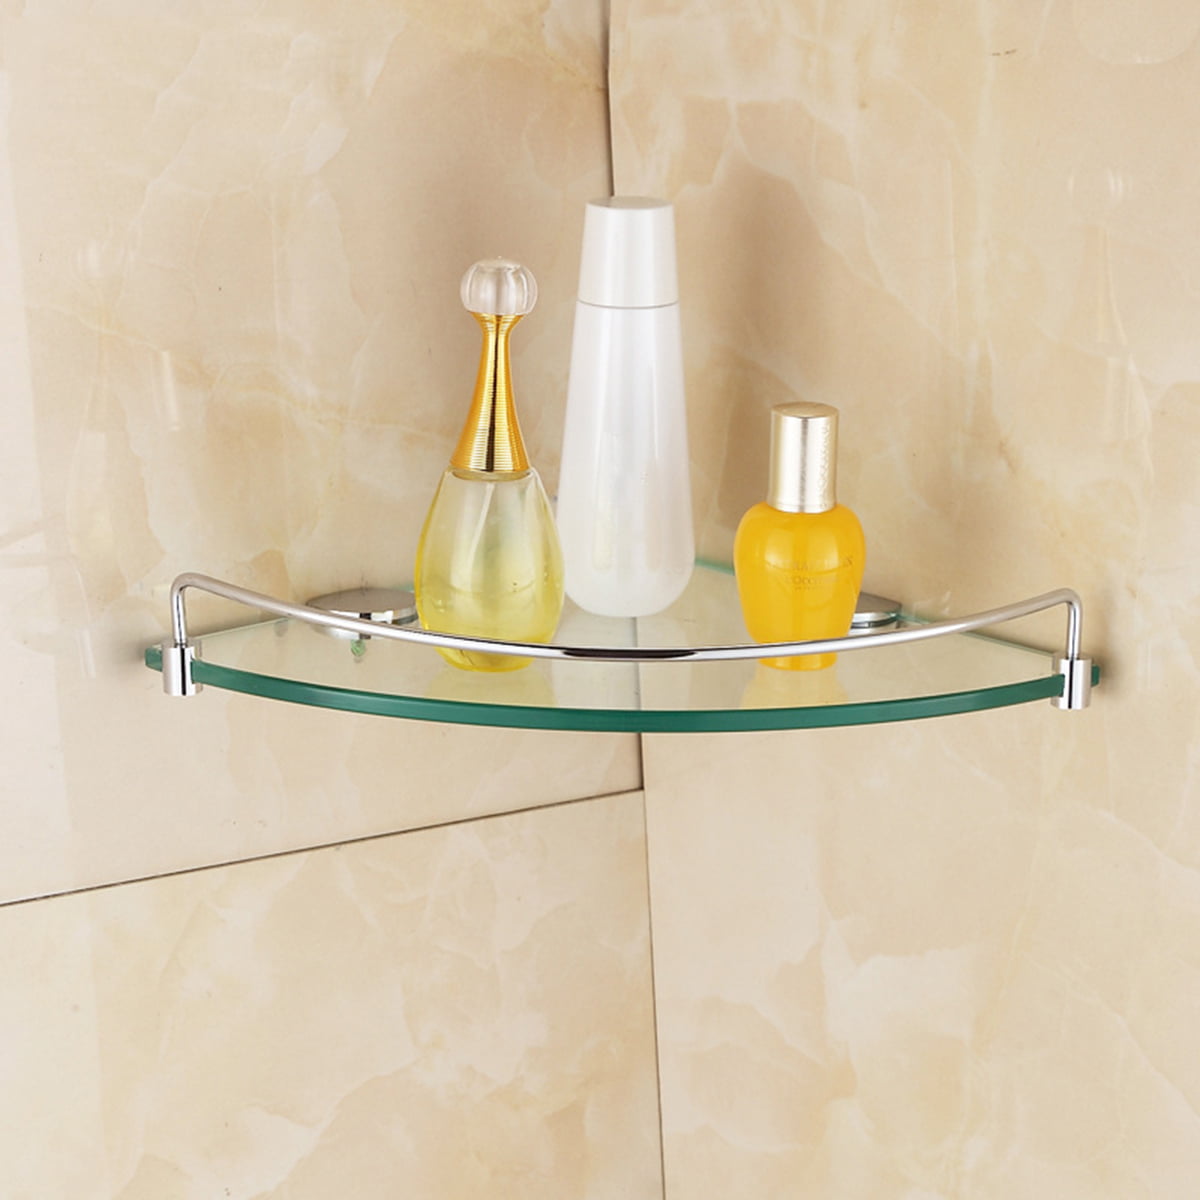
What: A sleek, single-layered glass rack that fits perfectly into the corner of your shower or bathroom.
Why: This corner rack is perfect for storing toiletries like shampoo bottles, loofahs, and soap. It keeps your shower organized without taking up too much space.
Types of: You can find this type of rack in different materials such as chrome, stainless steel, or brass.
Benefits: Glass racks are easy to clean and maintain, and their transparent design makes them look seamlessly integrated with your shower area.
Advantages: Glass racks are perfect for small bathrooms or showers, as their see-through design creates the illusion of more space.
How to: Follow these steps to install a shower triangular rack:
- Gather tools: drill, screws, anchors, and screwdriver.
- Measure the height of the shower wall where the rack will be installed and mark it with a pencil.
- Drill holes on the chosen spots using a drill bit.
- Insert screws and anchors on the holes until they are flush with the wall.
- Carefully slide the rack on top of the screws and fasten it with a screwdriver.
Tips: To avoid slipping in your shower, choose a glass shelf with a non-slip rubberized grip underneath.
3. Small Stainless Steel 3-Tier Shelf

What: A compact, modern stainless steel corner shelf with three tiers for storage.
Why: These shelves are great for smaller spaces, and their stainless steel construction ensures that they won’t rust or corrode.
Types of: You can find similar types of shelves in materials like chrome, nickel or brass.
Benefits: Stainless steel is easy to clean, and its sleek look fits in with a modern décor. Plus, the multiple tiers of these shelves allow you to display more of your favorite items.
Advantages: The compact design of these shelves makes them perfect for small living spaces or apartments, and they can be used to display small decorative items or store toiletries.
How to: Follow these steps to install a stainless steel three-tier shelf:
- Gather the tools: drill, screws, anchors, and screwdriver.
- Measure the height of the corner wall where you want to install the shelf.
- Mark the spot where you’ll be drilling the holes, and use a drill bit to make them.
- Insert the anchors into the holes, and then screw in the shelf’s mounting brackets.
- Attach the shelf itself to the brackets by screwing in the bottom of the shelf to the bracket from below with a Phillips-head screwdriver.
Tips: Choose a high-quality stainless steel shelf to ensure longevity and durability.
4. Corner Shelf Unit

What: A wall-mounted unit of several wood, metal, or glass shelves that fit into the corner of a room.
Why: These units are great for maximizing storage and displaying items, and their multi-level design offers a unique way to add flair to your room.
Types of: These versatile shelves come in a range of sizes and materials, including wood, metal, and glass.
Benefits: These corner shelf units offer a sleek, modern look that blends seamlessly with a variety of decor styles. They’re practical and can be used for storage or display.
Advantages: The versatility of corner shelf units makes them perfect for home offices, living rooms, and other areas where storage is essential.
How to: Follow these steps to hang a corner shelf unit:
- Gather tools: screwdriver, screws, anchors, level, and drill.
- Mark the height and placement of the shelf. Use a level for accuracy.
- Drill holes in the spots you marked, and insert the wall anchors into the holes.
- Attach the mounting brackets to the wall using screws and your power drill.
- Attach the shelves to the brackets, following the manufacturer’s instructions. Make sure they are level!
Tips: For a cohesive look, choose a corner shelf unit that matches or complements the decor already in the room.
5. Kitchen Floating Corner Shelves

What: Sleek floating shelves that mount directly to the wall in the corner of your kitchen.
Why: Floating shelves are a great way to add character to your kitchen without taking up too much space. They’re also practical for storing frequently used items.
Types of: You can find these shelves in a variety of materials, including wood, glass, and metal.
Benefits: These shelves offer a modern, streamlined look that fits in with any kitchen style. Plus, they’re easy to clean!
Advantages: The practicality of these shelves means they’re perfect for small kitchens where space is at a premium. They can be used for storage or display, and they’re easy to install and maintain.
How to: Follow these steps to install floating corner shelves in your kitchen:
- Be sure to use a stud finder to locate the studs in your kitchen wall.
- Mark the height and placement of your shelves with a pencil.
- Drill pilot holes into the wall studs where you want your shelves to be mounted.
- Screw mounting brackets to the wall, using the pilot holes as a guide.
- Attach the shelves to the brackets, following the manufacturer’s instructions.
Tips: To add a pop of color to your kitchen, paint your shelves a vibrant hue that complements or contrasts with your kitchen decor.
With all these creative DIY corner shelf ideas, getting organized never looked so good. Whether you’re looking for extra storage or ways to enhance your decor, these shelves will do the trick. Happy decorating!


